Importing a Map and Configuring a Scene in Foundry VTT
Foundry Basics
Hello everybody! Now that we have Foundry VTT installed and configured with a world set up we can get to the best use case of a Virtual Table Top: displaying maps.
Creating a Scene
All maps in Foundry are called Scenes. Scenes contain a map, tokens (from your players to the innocent townspeople they’ll murderhobo), lights, journal entries, weather effects, etc. But we’re not going to bother with all of that right now. Let’s start simple by taking a look at what’s in the Scenes tab in this right hand sidebar, which is the tab with the folded map icon.
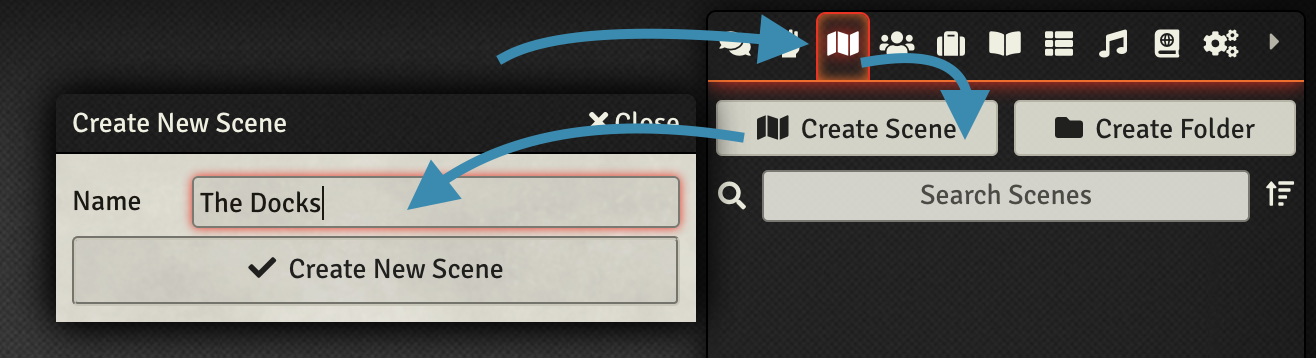
You can click the ‘Create Scene’ button to start making a scene or the ‘Create Folder’ button to make folders that you can organize your scenes in. There’s also a ‘Search’ field for finding a scene quickly, and the arrow button to the right will collapse any open folders that you have. Since we don’t have any though it’s not gonna help us much. Let’s fix that.
Go ahead and hit ‘Create Scene’. Let’s name our scene “The Docks”. Now there’s a bunch of options in this window and it might look intimidating but it’s really not bad at all. Let’s run through what each part does.
Scene Configuration Settings
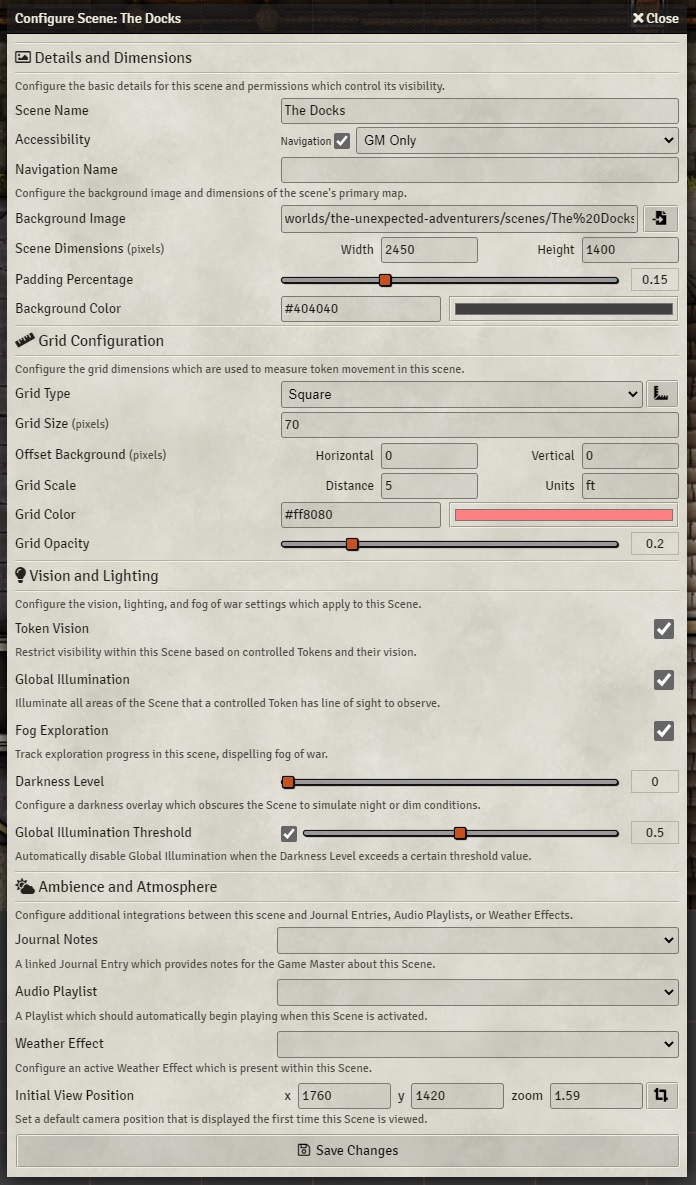
- Scene Name – This is the name of your scene and will be how its identified in the Scenes tab and in the navigation bar when you’re switching between scenes (which we’ll cover later, don’t worry!)
- Accessibility – This controls whether the scene should be added to the navigation bar at the top of the page when we save it and the dropdown controls who can see the scene when it’s in the navigation bar. By default only the GM can see it but you can change it to be visible to your players as well.
- The Navigation Name setting is just the name of your scene in the navigation bar. You may want to name your scene “Vecna’s Lair” but want your players to see it as “Spooky Place”. This can help with that.
- Then we’ve got the Background Image. This is where you’ll add your map. You can click the icon to the right to navigate your folders and upload your map now. I like to put them within the scenes directory of my current world.
- Then there’s the Width/Height: This is the width/height of your image. It will be determined automatically but you can override it with your own settings if you want to stretch or shrink the map.
- The padding percentage field controls how much empty space there should be around your map where you might stage tokens or place your players before they enter a dungeon.
- The Background Color field changes the color of the background and that empty padded area.
- Now we can look at the grid. The grid type lets you choose from a number of different options like gridless, square, or hexagonal. We don’t judge here. You can use the icon to the right of the dropdown to resize the grid to match your map. Which we’ll take a look at in a moment.
- Then we can set the Grid Size. This is looking for the pixels per inch of your grid or to put it simply, how many pixels wide each square is. If you don’t know you’ll have to eyeball it using the grid alignment tool that we’ll look at in a moment. Common values are 50, 70, and 100 though. If your grid’s starting place is offset from the edge of the image you can use the Offset Background values here to adjust for that.
- Next up is Grid Scale. This is referring to the unit of measurement for the grid. Since we’re using DnD 5th Edition feet is correct and the Distance should be five because each square is five feet. You can also control the color and opacity of the grid lines using the Grid Color and Grid Opacity settings.
- Now we can take a look at vision and lighting. When Token Vision is enabled your players can only see within their line of sight and their vision is blocked by a lack of light, walls, and other objects. With it turned off they can see the entire map regardless of walls in the way. This is good for theater of the mind moments with mood images or a starting splash screen before you get into the session.
- When you turn on Global Illumination it means that every part of the map is well lit and the only thing that will block your player’s vision are things like walls and other obstructions. We’ll look more at this and the Global Illumination Threshold setting in the lighting and vision walkthrough later.
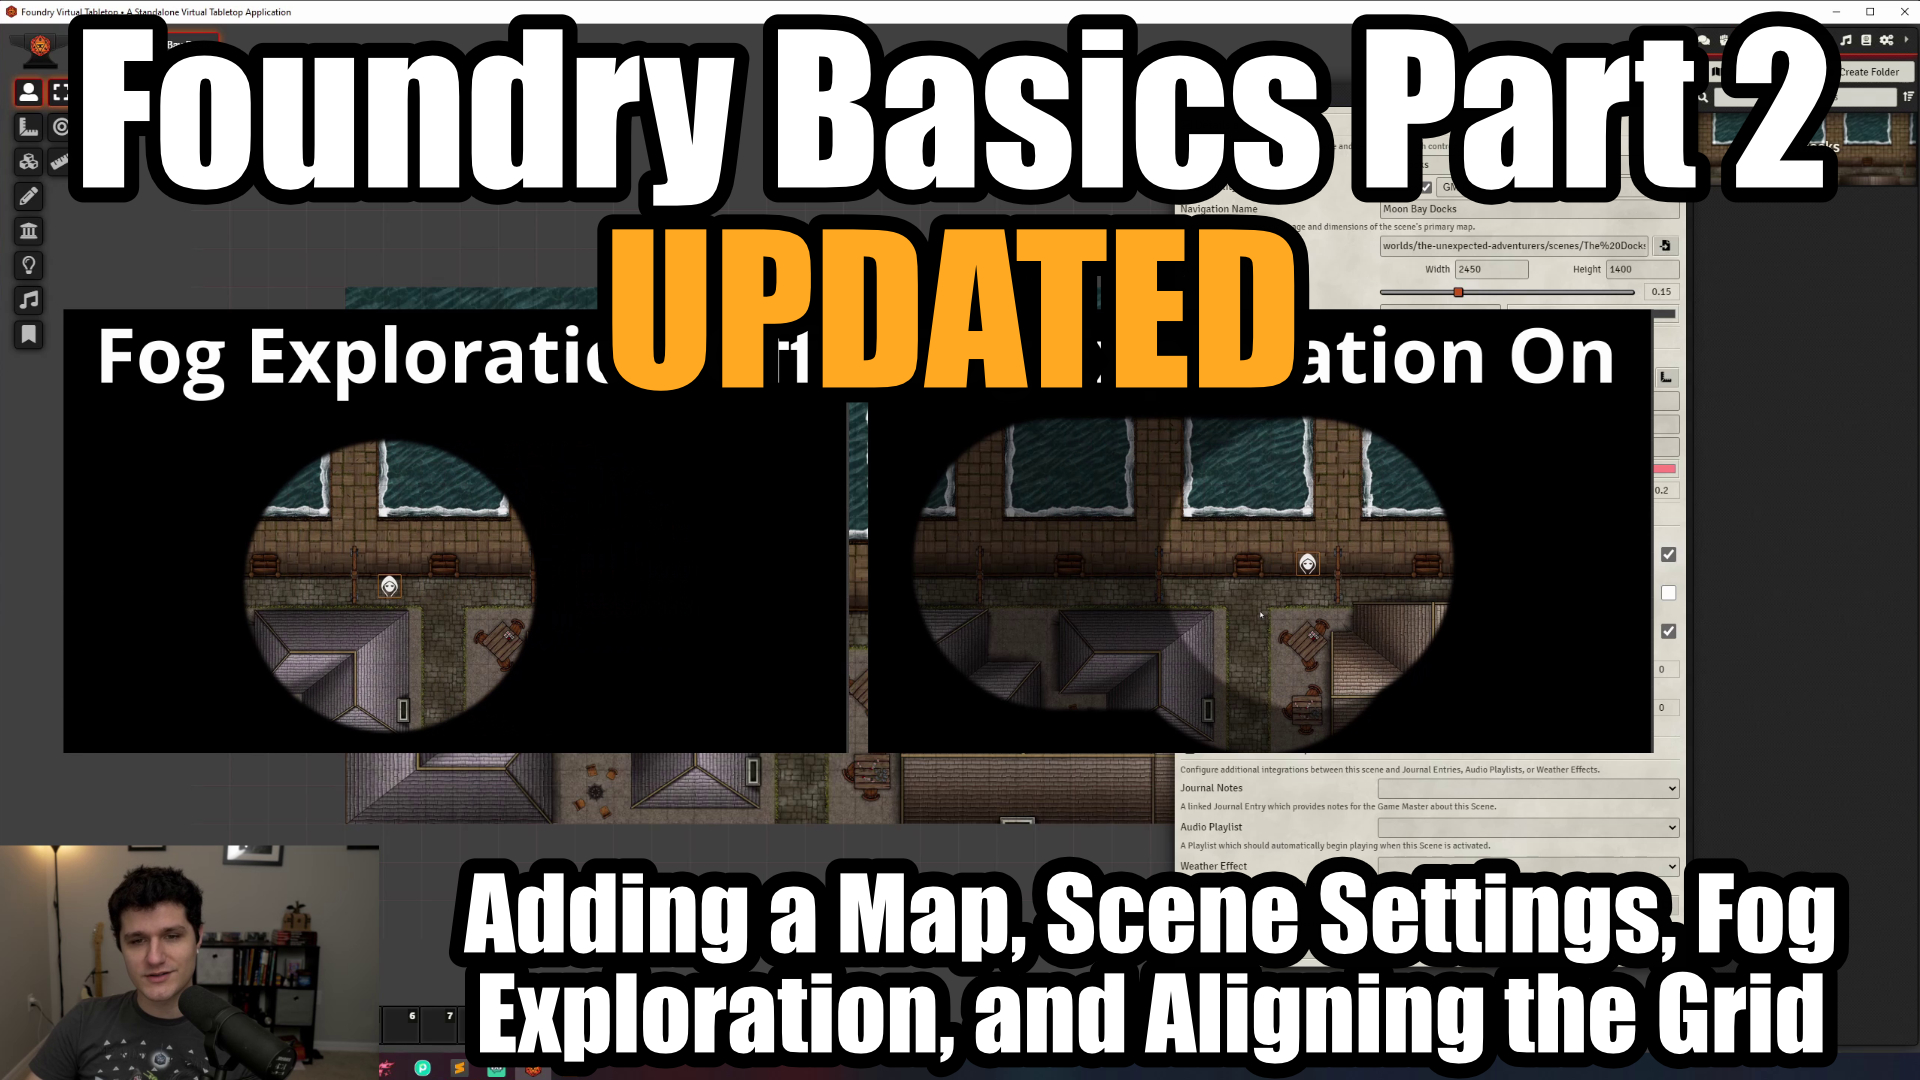
- We’ll also cover Fog Exploration in more detail but for now what it means is that anything outside of a token’s line of sight will be black until they have moved through it once or the area is well lit and there are no walls in the way. Then as they move out of the area it will remain revealed but they won’t be able to see what’s happening once their line of sight is blocked. If you want a simpler fog of war solution then be sure to check out my video on Simple Fog which will give you a Roll20 style fog of war that you can brush away.
- The Darkness Level applies a dark tint over your map so that it looks more like night time. It also works with the Global Illumination Threshold but we’ll look at that in the lighting video.
- Now we can take a look at the Ambience and Atmosphere settings. The first is the Journal Notes option. We’ll look at journals more in another video but they’re basically image and text notes that you can name, place on maps, and show to players as well as review yourself. By setting a Journal Note here, you’ll be able to view it quickly when you right click on a scene.
- You can also set an Audio Playlist that will play automatically when you switch to this scene which is great for setting the mood.
- There’s a number of built in Weather Effects that can be used to set the mood as well. You can always get more effects through modules too.
- Lastly is the Initial View Position. This sounds complex but it basically just controls where on the map your players view will be set when you activate the scene. You can zoom in to a specific area of the map and press the button to the far right, and it will make it so when your players load in, they’ll see that part of the map first.
Once you’ve set your Scene Name, Background Image, and Grid Info we can go ahead and hit ‘Save Changes’ and – tada, our map is visible!
Aligning Our Grid
Finally you’ll just want to make sure that your grid aligns with the grid that is already on your map (if there is one). If there’s not you can just do a spot check to make sure how big each square is seems logical, keeping in mind each square should represent about five feet.
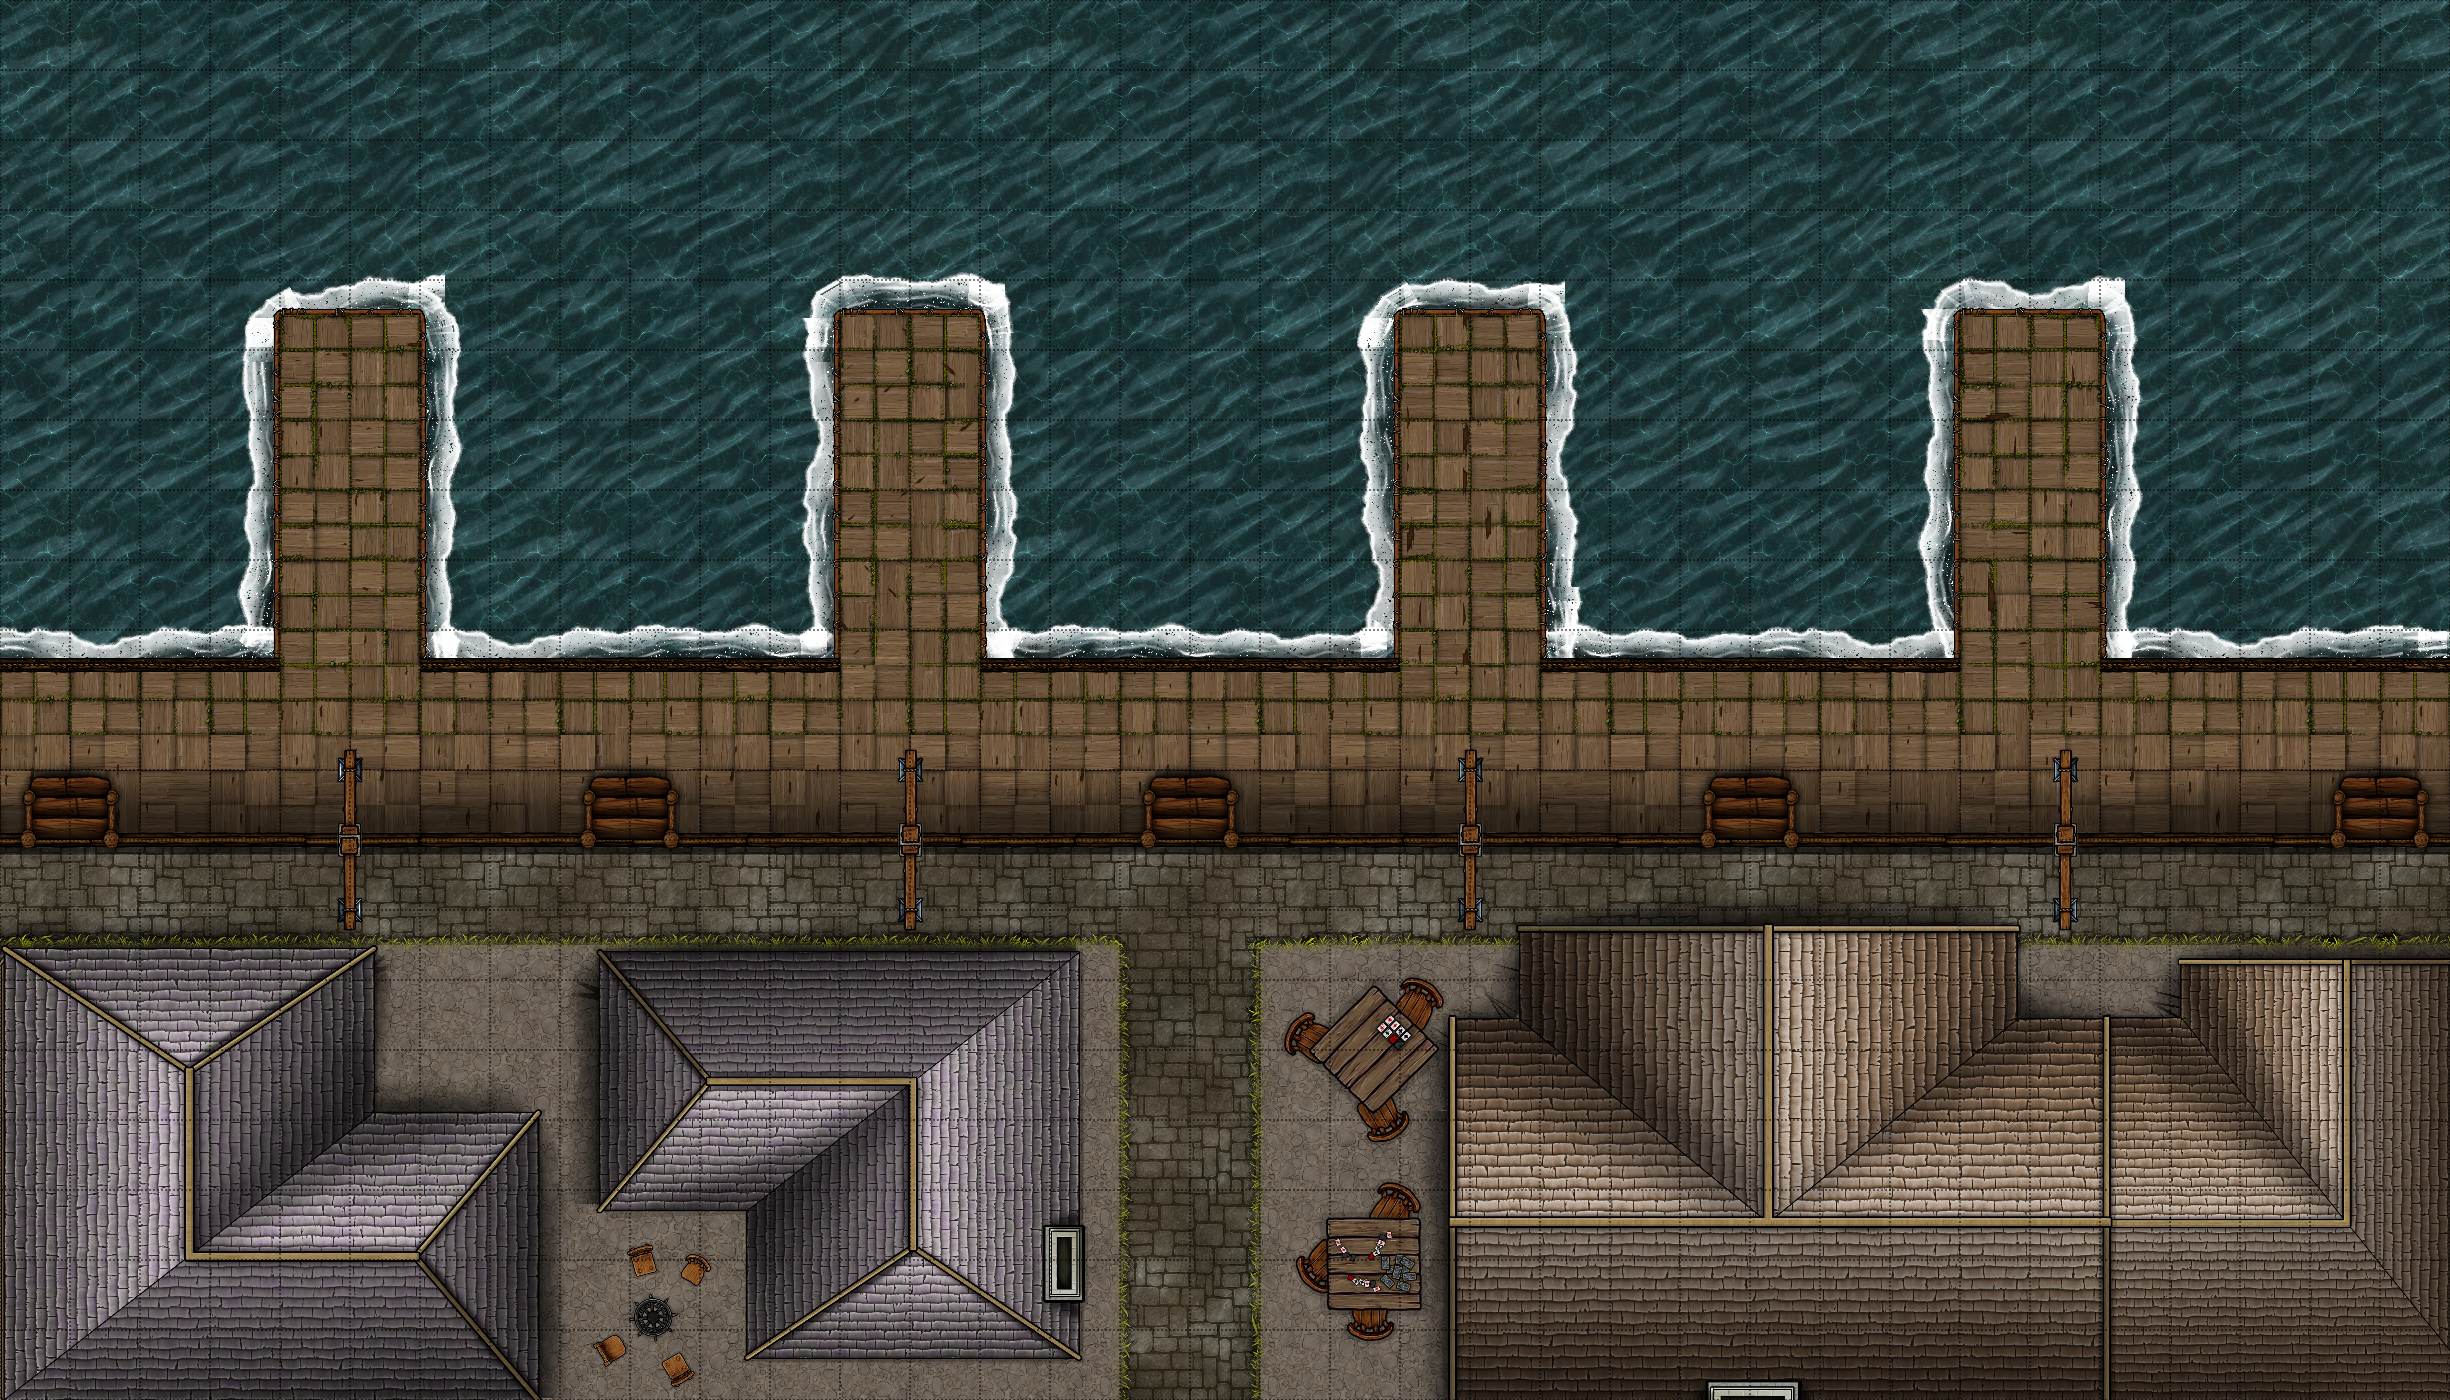
If you have a map where the grid doesn’t line up or where you don’t know the pixels per inch then there’s a few options that we can try. You’ll want to make sure that you have a scene where the map is already added so you can see your changes as you make them. I’ll use this map which already has a grid and we can see that Foundry’s grid is not properly aligned on top of it. Let’s get to it! Open the Scene Configuration options by double clicking on the scene you want to edit in the Scenes tab or right clicking and selecting ‘Configure Scene’.
If your map image already has a grid on it then try counting the number of squares either horizontally or vertically and then dividing the width or height by the number of squares. If your squares are all the same width and height like they should be that should get you the pixels per inch. In my case that’s 70. I’ll set the Grid Size to 70 and it’s working!
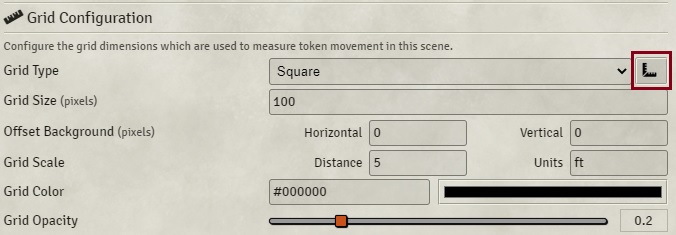
If arithmetic hurt you when you were a kid though we can skip that basic division and use the grid alignment tool by clicking this ruler right next to our grid type. I’m going to change the grid size to make it incorrect again by setting it to 100. Foundry’s grid is now a bright red so we can see it easily and if we zoom in we can tell that the grid is a bit too big. We can control the grid by changing the background image scale by holding shift and scrolling (or just entering a value) which will make the background image bigger, but it’s probably better to just adjust the grid size value down here by pressing the alt key and scrolling or entering a value. We can also offset the grid to the left or right or top or bottom with the arrow keys.
Let’s stick with the grid size for now though. As we noted earlier Foundry’s grid seems to be too big so let’s try decreasing it from 100 to 80. If you type in the number be sure to click onto a different field so the map will update in the background.
If you used the scroll wheel though you’ll see that the grid now seems to be in a totally different position and it’s hard to tell if it fits or if it’s still too big. That’s because the map no longer starts at the top left of one of the grid squares. There’s an easy way to fix that. I like to just increase and then decrease the background image scale by holding shift and scrolling up one and then scrolling down one. This repositions the map and makes it much more clear if we still need to do anything.
Now that we’ve done that it’s clear that the map is still a bit too big so let’s keep going down to 70, do the same scrolling trick again, and we’re good! We can now hit ‘Commit Changes’ and our maps grid will now be perfectly aligned.
That should cover everything that you need to know about importing maps and aligning your grid. Next up we’re going to take a new look at creating tokens, the character sheet, and adding our players to the game. Thanks for sticking around and I’ll see you in the next one.