Adding Players, Creating Actors, and Setting Up Tokens in Foundry VTT
Foundry Basics
In the last guide we set up our map and now we can start setting up our players, their characters, and the tokens that will represent them on the map.
Create an Actor and Drag it on to the Map
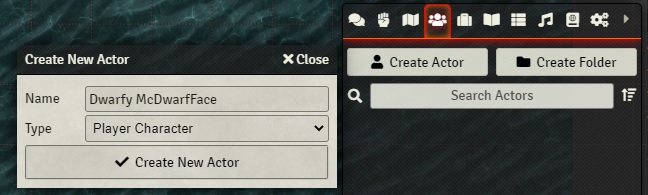
Let’s start with a character first. In the right hand sidebar change over to the Actors tab which is the fourth option from the left and then click Create Character at the top and enter in a character name. We’re going with Dwarfy McDwarfFace. You’ll notice that there is also a Type dropdown that will vary based on what your system allows. The DnD 5E system provides character, NPC, and vehicle options. NPC and character sheets are pretty similar other than a few differences like a challenge rating instead of a level, different inventory system, and a handful of other things that we’ll take a look at later. Vehicles are similar but also provide a ‘Cargo & Crew’ tab and your system may provide other options as well. For now let’s just leave it as character. Hit Create New Actor and we should be good to go!
Let’s close the character sheet for now and drag your actor onto the map and you’ll see its token appear which is set to the Mystery Man icon by default. You can move the token around with your mouse or your arrow keys, double click on it to see its character sheet, and a lot more that we’ll look at later.
Differences Between Prototype and Token Settings
Before we get too far though let’s learn what an actor is in Foundry. An actor is just about every creature that exists in your world from hero to monster. It’s the combination of stat block, inventory, token, spells, and actions that your system says every creature should have. One important thing to remember is that the actor also contains all the settings for its token. But there’s one kinda tricky bit to that and that’s the difference between the prototype token settings and the token settings.
To see what that means double click on your token and you’ll see at the top an option for ‘Sheet’ and another option for ‘Token Settings’. Now close it and go over to the Actor’s Directory and double click on your actor there. Now at the top of the sheet we’ll see a ‘Sheet’ and a ‘Prototype Token’ option.
Think of prototype token settings as the blueprint for the token. So whatever settings you enter here, like changing the ‘Display Name’ dropdown to ‘Always for Everyone’ means that whenever you drag this token out onto the map like this, it will have those settings by default. Changing the prototype token settings doesn’t change tokens that are already on the map though as you can see our previously placed token is not displaying its name.
Which brings us to token settings. Token settings are specific to the token already on the map. So we can have the same token on the map with different settings if we change them by double clicking on the token and then going to its token settings. This is super useful. Imagine you had a ‘Commoner’ actor and you dragged a dozen or so of them out onto the scene. You can now open their token settings and give them all unique names while not having to have a dozen different commoner actors polluting your sidebar.
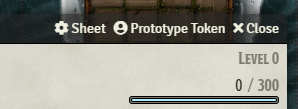
The top of the character sheet when opened from the Actor’s Directory.

The top of the character sheet when opened from the token.
What Do the Settings Actually Do?
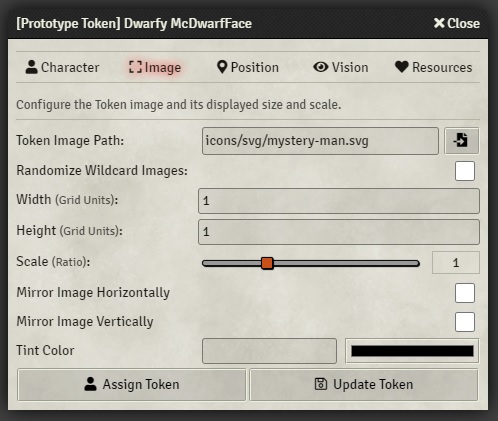
Now that we know what prototype token settings do let’s see what those settings actually are. Click on prototype token settings at the top of the character sheet and you’ll see the following tabs Character, Image, Position, Vision, and Resources.
Keep in mind that because we’re in the Prototype Token Settings all of these settings will be the default for all tokens created from this actor because we’re changing the blueprint right now. All of these settings are also available in the Token Settings as well.
The Character Tab
Let’s look at all these settings starting with the Character tab!
The Token Name is the name that will appear for the token if names are visible and it can be anything you’d like.
The Display Name setting controls who can see your token’s name. The options are:
- Never Displayed
- When Controlled which means the name will display only to a person who can control the token when they actively have it selected
- Hovered by Owner means the name will display whenever someone that owns the token hovers over it and only to that person (and we’ll go over token ownership later)
- Hovered by Anyone means the name will display on hover to anyone
- Always for Owner means it will display to anyone who owns the token at all times
- And Always for Everyone means it will always display to everyone
The Represented Actor setting controls what actor this token represents. If we click on it we’ll see a list of Actors available and this should be set for you automatically. If you ever want to change it though you can.
The Link Actor Data setting can be a little confusing at first. The Actor Data is basically everything in the character sheet. If you have it checked that means that any change made in the token’s character sheet will also be visible in the Actor’s character sheet. So if I go to a linked token and reduce its health by 5 and then check its character sheet in the Actor’s tab it will be reduced there as well. If I pull out another copy of the linked token from the actor’s tab I’ll see its health reduced there as well. This is good for any character that should carry its character sheet to a new scene. So use it for things like your player characters or a recurring foe.
For our ‘Commoner’ example from earlier we would want to uncheck this Link Actor Data because each of our commoners should have their own health pool but they aren’t really important enough to have their own actors. Thankfully for characters it is checked by default and for NPCs it is unchecked by default so you can drag in a dozen kobolds and not worry about their health getting mixed up.
The Token Disposition dropdown controls the color of the border around a token when you hover over them and represents how this token views the party. It doesn’t really impact anything though so you can mostly ignore it.

Demonstrating how to use wildcard images for tokens.
The Image Tab
Let’s jump over to the image tab now where we can take a look at the settings for our token’s image and size.
The Token Image Path is a filepicker that lets you select an image or upload one to serve as the image representing your token on the map. You can navigate through all your folders here and create new ones with the + button right here. You can also change how the files are displayed with these four buttons.
The Randomize Wildcard Images setting is useful if you have a directory of images and each time you drag out a token you want it to have a different image like our Commoners example earlier. You can use an ‘*’ to represent a wildcard search and each time you place a token it will randomly select an image from that directory. Refer to the demo WebM for an example.
The Width and Height settings controls how many grid units wide or tall the token should be. The default and most common will be 1 but larger creatures might take up more space.
Scale lets you change the width and height of the token to be bigger or smaller.
Mirror Image Horizontally will flip the token horizontally and Mirror Image Vertically will flip it vertically.
Lastly there’s the Tint Color option which lets you add a tint to your token which can be fun if a token is poisoned or covered in some kind of muck.
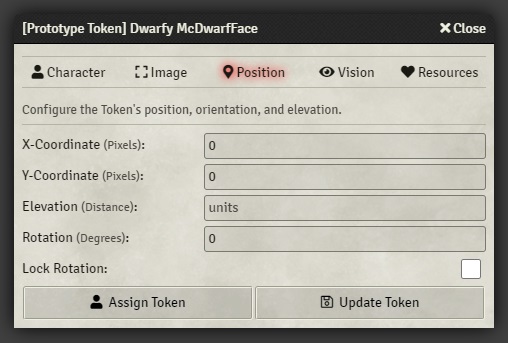
The Position Tab
Let’s go to the Position tab. These fields will almost never need to be changed manually or paid attention to at all but let’s go over them real quick.
X-coordinate – This is where your token is on the x-coordinate in the scene
Y-coordinate – is where your token is on the y-coordinate in the scene
Elevation – This describes where your token is in terms of elevation (but does not actually change anything and is just for notes and modules to use)
Rotation – Details how much the token is rotated (which can be done by holding SHIFT or CTRL and scrolling).
And Lock Rotation – Prevents the token from rotating.

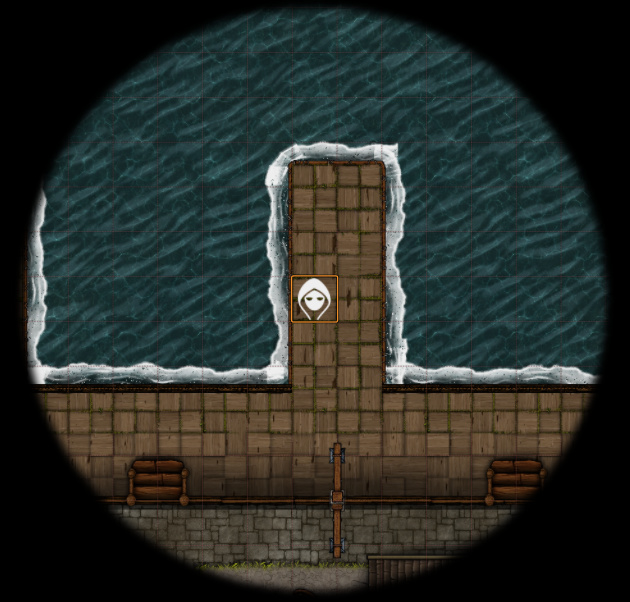
Vision with no light and 0 feet of dim/bright vision.
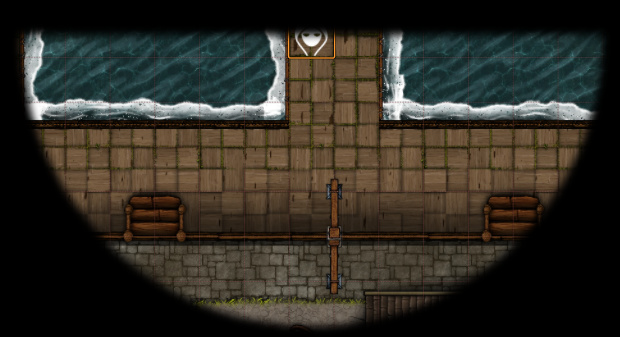
Vision with no light and 30 feet of dim vision.
Vision with no light and 180 degree sight angle and 30 feet of dim vision.
The Vision Tab
Vision in Foundry is super important because it controls what your players will be able to see. So this tab is critical and can be a little complicated. First off here’s how vision works in Foundry:
When you first create a scene there are no lights to make things visible (unless you’ve turned on Global Illumination) and no walls to block your line of sight. Since there are no lights, it is dark. That means unless you have dark vision you can’t see anything. So how would we give our token dark vision? That’s where the dim vision and bright vision settings come in. They control how well your character can see in darkness. Since dark vision let’s you see 60 feet out as if it were dim light, we’ll go ahead and set dim vision to 60. We don’t have any bright vision because in the dark with normal dark vision you can’t see anything as if it were in bright light. If you had a Warlock invocation like Devil’s Sight however you can see in darkness as if it were bright light out to 120 feet so we would set our bright vision to 120. If you’re a race with no dark vision you would set both to 0 and you won’t be able to see past your token when in darkness.
The sight angle setting controls in what direction you can see. By default it’s 360 degrees around you but you can reduce it to 180 to see just the direction your token is facing or any other value.
The dim light and bright light radius settings are similar to dim vision and bright vision but they control how much light you’re emitting. The difference is that other tokens will be able to see light that you’re emitting. This is useful for things like torches. With a normal torch you would set your dim light to 40 feet and your bright light to 20 feet which will brighten the area around you and allow other tokens to see as well. You can also change the emission angle which controls in which direction your light is going in case you have a directional lantern or something like that. You can also change the light color, how intense it is and add an animation type like a torch flicker. You can then also tweak the animation speed and intensity. There’s a whole guide on lighting coming up soon though so we won’t go over all of these options in detail.
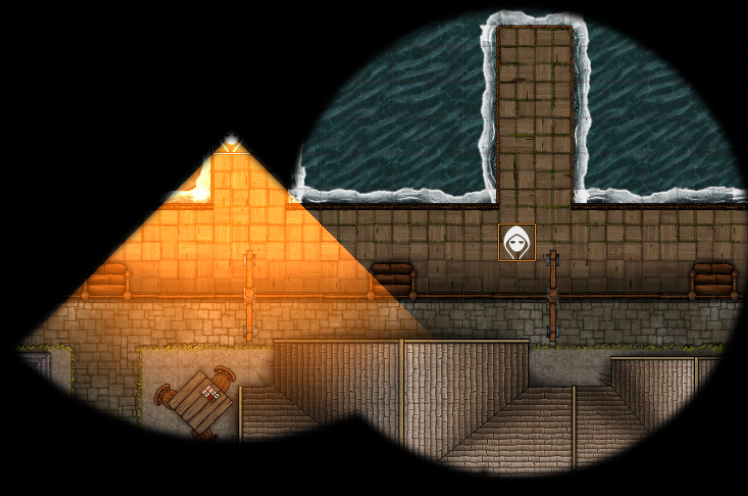
Token with 30 feet of dim vision seeing another token emitting 40 feet of dim light and 20 feet of bright light in a 90 degree angle.
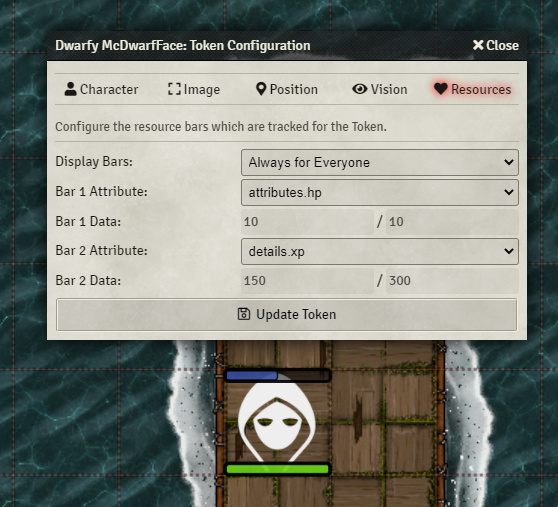
The Resources Tab
Lastly we have the resources tab. In Foundry you can have a bar above and below your token which will each track a different resource if you want it to.
First off you can control who can see the bars with the Display Bars setting. It has the same options as the Display Name option under the Character tab so I won’t go through all that again.
The Bar 1 Attribute is the attribute that the bar represents. There are too many options to list here but common options are HP, specific spell slot levels, XP, etc.
Bar 1 Data – Contains the current and maximum values from the Bar 1 Attribute that you selected. It’s the same thing for the Bar 2 attributes and data.
Assign Token and Update Token Buttons
Using the assign token button to change the prototype token settings to match the selected token.
There’s one last part of the prototype token settings we should go over and that’s what this Assign Token button does.
Assign Token – This one is a little confusing but let’s see if we can break it down simply. First off, it’s only available in the prototype token settings and it takes the values of a selected token and replaces the current values with them. Let me repeat that in the context of how you would actually use it. Let’s say you placed a token on the map for a bandit and you made some changes to its token settings (not the prototype token settings mind you) and you realized that you wanted that to be the new default. You could click onto that token to control it and then go to the Actor’s Directory and open the actor whose settings you want to replace, then go to their prototype token settings and click Assign Token. You can see that the values we changed in the bandit are changed here as well.
Then of course there’s also the Update Token button which just saves the changes that you’ve made.
Adding a Player to the World
Now that we’ve gone through the extensive explanation of character and token creation/settings we can finally add a player and assign them to a character that they can control.
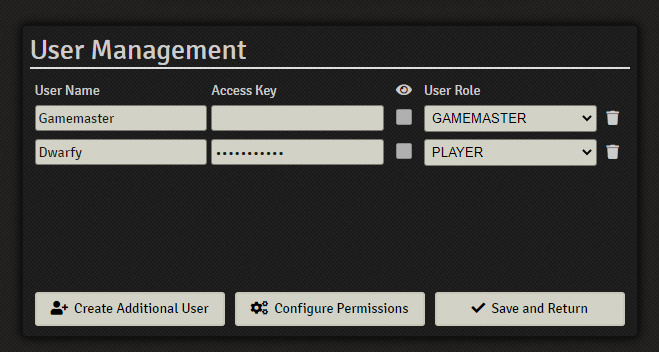
To do that we’ll need to open the Configure Players menu by clicking on the gear icon to access the Game Settings tab in the right hand sidebar and choose the Configure Players option.
This will open up a new menu where we can add player names (using the Create Additional User button), passwords (called an Access Key), and give them a user role with this dropdown. Unless you want your players to have advanced permissions you should be good to leave them at the Player level. We’ll go over different permission levels in another guide. Once you’ve added your players you can press Save and Return.
Assigning a Player to an Actor
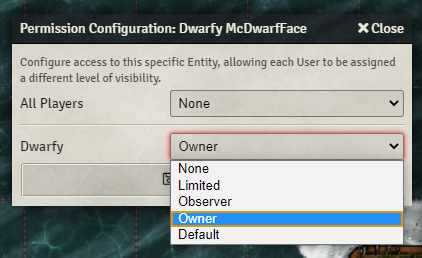
Now we can go back to the Actor tab in the right hand sidebar and find the actor we want to give the player control over. Right click on the actor and click Configure Permission. In the new window you can give a permission to All Players or just a specific player. The options are None, Limited which makes it so a player can see the actor in the sidebar and some limited information about it but can’t control it, Observer which does all of the prior stuff but also lets the player see their character sheet and see what that token can see but it doesn’t let them move it around, and the Owner permission let’s someone do all of the prior stuff but also move the token and make changes to its character sheet. The ‘Default’ option will just use whatever setting is set for ‘All Players’.
That’s it! You did it! It was a bit of a slog to get here but this should cover everything you need to know about actors and their tokens. Next up we’re going to start adding walls, doors, windows, and more to our map so I’ll see you in the next one.